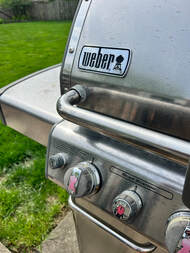
Spring is here, and for many of us, that means it's time to dust off the old outdoor gas grill and get it ready for the grilling season. But before you fire it up, it's important to take a few steps to ensure that your grill is clean, safe, and working properly. In this blog post, we'll share some tips and instructions on how to get your outdoor gas grill ready for spring, and how to repair it if there's an issue.
Clean the grill
The first step in getting your outdoor gas grill ready for spring is to give it a good cleaning. Over the winter months, your grill may have accumulated dirt, dust, and debris, so it's important to get rid of all of that before you start cooking. Here's how to do it:
Before you fire up your grill, it's important to check the gas supply to make sure it's working properly. Here's how:
If your grill has an electronic ignition system, it's important to check it before you start cooking. Here's how:
If you notice any issues with your grill while you're getting it ready for spring, it's important to address them before you start cooking. Here are some common issues and how to fix them:
By following these tips and instructions, you can get your outdoor gas grill ready for spring and enjoy a season of delicious outdoor cooking. If you encounter any issues that you're not comfortable fixing yourself, don't hesitate to contact a professional for assistance.
Clean the grill
The first step in getting your outdoor gas grill ready for spring is to give it a good cleaning. Over the winter months, your grill may have accumulated dirt, dust, and debris, so it's important to get rid of all of that before you start cooking. Here's how to do it:
- Turn off the gas supply to the grill and disconnect the propane tank.
- Remove the grates and any other removable parts from the grill.
- Scrub the grates with a wire brush or grill brush to remove any built-up residue. If the grates are particularly dirty, you can soak them in hot, soapy water first.
- Clean the inside of the grill with a wire brush or scraper to remove any leftover food or grease. Be sure to remove any debris from the burner tubes and ignition ports.
- Wipe down the exterior of the grill with a damp cloth.
- Check the gas supply
Before you fire up your grill, it's important to check the gas supply to make sure it's working properly. Here's how:
- Reconnect the propane tank and turn on the gas supply.
- Turn on the burners and check the flame. The flame should be blue and steady. If it's yellow or flickering, there may be an issue with the gas supply or burner tubes.
- Check the hoses for any cracks or leaks. If you notice any issues, replace the hoses before using the grill.
- Check the ignition
If your grill has an electronic ignition system, it's important to check it before you start cooking. Here's how:
- Turn off the gas supply to the grill.
- Remove the ignition cap and check the battery. If the battery is dead, replace it.
- Replace the ignition cap and turn on the gas supply.
- Test the ignition by turning on the burners. If the ignition doesn't work, there may be an issue with the spark module or electrode.
- Repair any issues
If you notice any issues with your grill while you're getting it ready for spring, it's important to address them before you start cooking. Here are some common issues and how to fix them:
- Uneven heat: If the heat distribution on your grill is uneven, it may be due to clogged burner tubes. Use a wire brush or scraper to clean out any debris from the tubes.
- Low heat: If the flame is low or won't stay lit, there may be an issue with the regulator. Check to make sure the regulator is properly connected and the hoses aren't damaged.
- Hot spots: If your grill has hot spots, it may be due to a faulty heat shield. Replace the heat shield if necessary.
By following these tips and instructions, you can get your outdoor gas grill ready for spring and enjoy a season of delicious outdoor cooking. If you encounter any issues that you're not comfortable fixing yourself, don't hesitate to contact a professional for assistance.
This article is for general information purposes only. Rick Kelley Builders makes no representations or warranties of any kind, express or implied, about the completeness, accuracy, reliability, suitability, or availability of any information contained herein.


 RSS Feed
