Rick Kelley Builders
  • Home
    • Our Promise
  • Remodeling
    • Kitchen Photos
    • Basement Photos
    • Bathroom Photos
    • Miscellaneous Photos
  • About Us
    • Rick Kelley
    • Jeremy Kelley
  • Blog
  • Contact

Lint Happens: The Fuzzy Truth About Dryer Duct Cleaning

9/13/2023

 
Welcome, fellow lint enthusiasts, to another exciting blog post from Rick Kelley Builders! Today, we're diving deep into a topic that might not be at the top of your home maintenance checklist but is crucial for your safety, energy efficiency, and even a little bit of humor – cleaning the lint out of your dryer ducts. So, grab your lint rollers and put on your detective hats, because we're about to uncover the secrets lurking in your dryer duct.

Lint, the tiny, fluffy villain that seems innocent enough, but it can wreak havoc on your dryer and your home if left unchecked.
  1. Fire Hazard: Let's start with the most crucial aspect – lint can be a fire hazard! Those cozy lint balls you've been ignoring are highly flammable. Over time, lint buildup can ignite and turn your laundry room or basement into a fiery inferno. By cleaning your dryer duct regularly, you're not just removing lint; you're preventing a potentially catastrophic fire. Did you know that between 2014 – 2018 local fire departments responded to an estimated average of 13,820 home structure fires PER YEAR in which dryers were involved in the ignition? Yeah, this is serious!
  2. Energy Drain: Lint isn't content with being a fire starter; it's also an energy vampire! A clogged dryer duct means your appliance must work harder, increasing your energy bills. Cleaning out the lint not only saves you money but also reduces your carbon footprint.
  3. Dryer Performance: Ever felt like your dryer is taking forever to do its job? Blame it on the lint! A blocked duct restricts airflow, making your dryer less efficient. Cleaning the duct is like giving your dryer a breath of fresh air – it'll dry clothes faster and more effectively, which means less waiting and more time for things you actually enjoy.

The DIY vs. Professional: You can do a decent job of this yourself if you have an electric or battery-powered leaf blower, a wet towel, and the ability to slide your dryer out and disconnect the duct. In fact, I did it at my house today (see video) and this is how I did it:
  1. Unplug the dryer and slide it out far enough that you can access the duct behind it.
  2. Detach the duct (likely some sort of clamp and/or tape). I also removed the louvered termination on the exterior of my home to allow for better airflow but this isn't absolutely necessary. If you have a screen though on the outside of your home covering the termination it must be removed for this to work.
  3. Get your battery-powered or electric leaf blower (DO NOT USE A GAS-POWERED leaf blower inside your home) and stick the business end inside the pipe and use a wet towel to seal around the pipe so you don't get covered in lint.
  4. Turn on the battery-powered or electric leaf blower and let it run for a minute or two.
  5. Reassemble everything just as you found it. 

Keep in mind this method does not actually scrub the sides of the pipe like a professional duct cleaning service would using a brush and vacuum system. If you are at all concerned about doing this yourself or are concerned that there is a lot of lint that is stuck to the side of the duct then a professional is required. 

So, there you have it, folks – the lowdown on why cleaning your dryer ducts is essential to your health, your dryer's longevity, and your safety. 

This article is for general information purposes only. Rick Kelley Builders makes no representations or warranties of any kind, express or implied, about the completeness, accuracy, reliability, suitability, or availability of any information contained herein.

Stay Cool This Summer: Top Tips to Help Your Home Air Conditioner Beat the Heat

7/26/2023

 
Picture
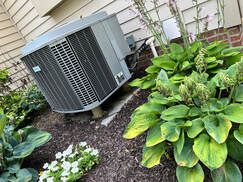
As the sun blazes high in the sky, there's no doubt that hot days are upon us. But fear not, for your trusted home remodeling company is here to ensure your indoor oasis stays refreshingly cool! Your air conditioner is your knight in shining armor, battling the scorching temperatures on your behalf. To make sure it triumphs over the heat, we've got some fantastic tips to keep your home comfortably cool during those sweltering summer days. So, let's dive in and learn how to harness the full power of your air conditioner!

1. The Art of Ceiling Fans:
When it comes to maximizing the cooling efficiency of your air conditioner, don't underestimate the power of ceiling fans. These nifty companions help circulate the cool air more effectively, making your rooms feel even fresher. Remember, ceiling fans don't lower the temperature; they create a wind-chill effect that makes you feel cooler. In summer, ensure your fans are rotating counterclockwise to generate that much-needed breeze.

2. Seal the Deal with Insulation:
A well-insulated home is a cool home. Insulation is your secret weapon against the summer heat, as it keeps the cool air trapped indoors and prevents unwanted heat from creeping in. Check your home's insulation to make sure it's in top-notch condition. Insulate your attic, walls, and windows to prevent cool air from escaping and reduce the strain on your air conditioner.

3. Block the Sun with Window Coverings:
While sunlight is beautiful, it also brings heat. Close your curtains or blinds during the hottest parts of the day to block out the sun's scorching rays. This simple yet effective tactic can significantly reduce the temperature indoors and ease the burden on your air conditioner.

4. Clean the Furnace Filter:
A clean furnace filter is vital for your air conditioner's health and efficiency. A dirty filter obstructs airflow, forcing your AC to work harder to circulate the cool air. Make it a habit to inspect and replace your furnace filter regularly during the summer months. A clean filter not only keeps your home cooler but also improves the indoor air quality.

5. Embrace the Thermostat Dance:
While we all love a cool and comfortable home, it's essential to use your thermostat wisely. Set it to a comfortable temperature, ideally between 72-76°F (22-24°C), to strike a balance between cooling and energy efficiency. Avoid drastically lowering the temperature, as it won't cool your home any faster. Instead, it only leads to excessive energy consumption.

6. Mind the Gaps:
Keep an eye out for any gaps or leaks in your home's windows and doors. These sneaky openings can let precious cool air escape, making your air conditioner's job more difficult. Seal any gaps with weatherstripping or caulk to lock in the coolness and prevent warm air from creeping in.

7. Be Mindful of Heat-Generating Appliances:
Appliances such as ovens, stoves, and even incandescent light bulbs can generate heat and increase indoor temperatures. On hot summer days, consider using these appliances during the cooler parts of the day or switch to more energy-efficient options to minimize the heat impact on your home.

8. Schedule Regular Maintenance:
Give your air conditioner the love and care it deserves by scheduling regular maintenance with a professional HVAC technician. A well-maintained AC unit operates more efficiently, lasts longer, and saves you money in the long run.
​

With these fun and factual tips up your sleeve, you can now take charge of keeping your home cool during the hottest summer days. From mastering the art of ceiling fans to ensuring proper insulation and maintaining your air conditioner, these steps will help you create an oasis of comfort amidst the sweltering heat.

Stay cool and enjoy the summer!


This article is for general information purposes only. Rick Kelley Builders makes no representations or warranties of any kind, express or implied, about the completeness, accuracy, reliability, suitability, or availability of any information contained herein.

Watering Your Lawn in Central Ohio: Beat the Heat and Keep It Neat!

7/14/2023

 
Picture
Don’t let your lawn feel the burn this summer. Here’s a guide that will ensure your lawn stays lush and lovely even in the scorching summer heat. With these practical watering tips, you'll have a vibrant lawn that will make your neighbors green with envy. So, grab your watering cans and let's dive in…


  1. Timing is Key: To give your lawn a fighting chance against the blazing sun, timing is everything. Aim to water your lawn in the early morning, before 10 AM. This allows the grass to quench its thirst before the heat intensifies. By watering early, you minimize water evaporation, ensuring your lawn gets the most out of every drop.
  2. The 1-Inch Rule: Watering your lawn just enough is crucial. Aim for about 1 inch of water per week. To gauge the amount, place a few empty cans around your yard while watering. When they collectively reach the 1-inch mark, you've hit the sweet spot.
  3. Avoid Puddle Problems: While it might be tempting to turn your lawn into a water wonderland, overwatering can do more harm than good. Shallow root growth is the last thing you want for your grass. Instead, focus on deep, infrequent watering sessions. This way, the water reaches the root zone, encouraging strong and healthy root development.
  4. Smart Sprinkler Strategies: Ensure your sprinklers are doing their job efficiently by positioning them properly. Cover every inch of your lawn evenly, so no patch gets left out. Keep the water on your lawn, where it belongs, and save your neighbor's cat from an unintended shower.
  5. Embrace Nature's Contribution: When Mother Nature decides to shower your lawn with rain, take advantage of it! Let the rain do the work for you. If it has recently rained, hold off on running your sprinklers. However, don't rely solely on rainfall; always be mindful of your lawn's hydration needs, especially during dry spells.
  6. Signs of Dehydration: Your lawn might not complain audibly, but it sure knows how to communicate. Watch out for signs of thirst, such as a dulling green color or crispy, brown patches. When you spot these indicators, it's time to step in with some much-needed hydration. Become your lawn's hero and save the day!
    ​

Now that you’re armed with these practical watering tips, you're well-prepared to keep your lawn thriving through the summer months. By timing your watering sessions, avoiding excess water, and paying attention to your lawn's needs, you'll be the envy of the neighborhood. So, go forth and nurture your lawn with confidence. Here's to a healthy and vibrant green carpet that will make your whole community take notice!


This article is for general information purposes only. Rick Kelley Builders makes no representations or warranties of any kind, express or implied, about the completeness, accuracy, reliability, suitability, or availability of any information contained herein.

Beat the Heat: Protecting Your Furry Friends from Heat Stroke

6/27/2023

 
Picture
As many of you know we’re animal lovers here at Rick Kelley Builders. Today we decided to take a break from discussing bricks, beams, and home maintenance tips to shed light on a topic that affects our beloved pets during scorching summers: heat stroke. While construction sites and summer heat go hand in hand, it's essential to remember that our furry companions are also susceptible to heat-related risks. So, let's dive into how to spot, prevent, and respond to heat stroke in dogs and cats...

Understanding Heat Stroke:

Imagine walking barefoot on a blazing construction site all day long—ouch! That's exactly how our pets feel when they're exposed to excessive heat. Heat stroke occurs when their body temperature rises above normal, reaching dangerous levels. As responsible pet owners and animal lovers, it's crucial to be aware of the signs and symptoms.


Spotting the Signs:


Detecting heat stroke early can be a lifesaver for your four-legged friends. Look out for these common indicators:

  • Heavy panting and excessive drooling
  • Rapid heartbeat and breathing
  • Weakness, stumbling, or collapsing
  • Vomiting or diarrhea
  • Bright red gums and tongue

Various factors can contribute to heat stroke in pets:
 
  • High temperatures and humidity: Remember, our pets can't sweat like we do, making it harder for them to cool down.
  • Overexertion: Strenuous physical activities during hot weather can quickly lead to overheating.
  • Enclosed spaces: Never leave your pets in parked cars, as temperatures can soar to deadly levels within minutes.

Now that we know the causes, let's explore effective preventive measures:
 
  • Hydration is vital: Ensure your pets have access to fresh, cool water at all times.
  • Time your walks: Opt for early mornings or late evenings when temperatures are cooler.
  • Create shaded spots: Set up cool, sheltered areas in your yard or provide them with a pet-friendly umbrella.
  • Paw protection: Hot surfaces can burn sensitive paws, so consider using booties or walking on grassy areas.
  • Avoid excessive exercise: Modify your pet's exercise routine during hot weather to prevent exhaustion.

If you suspect your pet is suffering from heat stroke, every second counts. Take immediate action:
 
  • Move your pet to a cooler area: Seek shade or bring them indoors.
  • Cool them down: Use cool (not icy) water and wet towels to lower their body temperature gradually.
  • Contact your veterinarian: Even if your pet appears better, it's essential to seek professional advice for a thorough examination.

The Importance of Vigilance:

Keeping a watchful eye on your pets during hot weather can save their lives. Heat stroke can be fatal if not promptly addressed. Remember, prevention is easier than treatment.

As we strive to protect and care for our pets, it's crucial to understand the risks they face in hot weather. By recognizing the signs of heat stroke, taking preventive measures, and acting swiftly, when necessary, we can ensure our furry friends stay happy, healthy, and safe all year round. We take all sorts of precautions at our project sites to keep everyone healthy and hydrated so let's extend our vigilance and create a pet-friendly environment in our homes.

Stay cool, stay safe, and remember, our pets count on us to be their heroes so if you see anything that is concerning please remember to call the authorities. 


This article is for general information purposes only. Rick Kelley Builders makes no representations or warranties of any kind, express or implied, about the completeness, accuracy, reliability, suitability, or availability of any information contained herein.

Powerwashing Your House: The Do's and Don'ts for a Fresh and Clean Home!

6/2/2023

 
Picture
Ready to give your home a stunning facelift? Powerwashing is the perfect solution to wash away dirt and grime, leaving your house looking brand new. But before you unleash the power of water, it's important to know the do's and don'ts of powerwashing. So, let's dive in and discover how to powerwash like a pro, without any messy mishaps!

1.  DO Prepare for a Successful Clean: Before you start powerwashing, make sure you're prepared for the task at hand. Clear the area of any obstacles, such as patio furniture or children's toys. Cover delicate plants or shrubs with plastic sheets to shield them from the intense spray. And remember to wear comfortable clothes that you don't mind getting a little wet. It's time to get down and dirty, in the cleanest way possible!

2.  DON'T Blast Away Fragile Surfaces: While powerwashing is great for removing dirt and grime, some surfaces require a more delicate touch. Avoid using high-pressure water on materials like wood, stucco, or vinyl siding, as it can cause damage. Instead, opt for a lower pressure setting or use alternative cleaning methods for these areas. You want a clean house, not a demolition site!

3.  DO Follow a Systematic Approach: To ensure an even and thorough clean, it's best to follow a systematic approach. Start from the top and work your way down, cleaning one section at a time. This way, you'll avoid missing spots or leaving streaks. Think of it as painting your house with water, stroke by stroke, until it shines like a masterpiece.

4. DON'T Get Too Close: Maintaining the right distance from the surface is crucial when powerwashing. Hold the nozzle approximately 1-2 feet away to prevent damage and ensure effective cleaning. Getting too close can lead to unintended consequences, such as paint removal or surface etching. Keep a safe distance and let the water work its magic without causing any harm.

5.  DO Use Cleaning Solutions Wisely: Sometimes, plain water isn't enough to tackle stubborn stains or mildew. In such cases, using a suitable cleaning solution can greatly enhance your powerwashing results. Be sure to choose the right solution for the surface you're cleaning and follow the manufacturer's instructions. A little soap and water can make a world of difference in the fight against grime!
​
6.  DON'T Neglect Safety Precautions: While powerwashing may seem like a fun activity, it's important to prioritize safety. Wear protective gear, such as safety goggles and gloves, to shield yourself from debris and flying water droplets. Also, be cautious of slippery surfaces after powerwashing. The last thing you want is to go from cleaning champion to acrobatic performer unintentionally!


This article is for general information purposes only. Rick Kelley Builders makes no representations or warranties of any kind, express or implied, about the completeness, accuracy, reliability, suitability, or availability of any information contained herein.

Understanding Quartz, Quartzite, and Granite

5/22/2023

 
PictureSilestone Miami Vena Quartz
Are you tired of being perplexed by the diverse world of kitchen countertops? Fear not, for today we shall embark on a delightful journey to unravel the mysteries behind quartz, quartzite, and granite countertops. Get ready to demystify these materials and make an informed choice for your kitchen!

Quartz:

​
Let's begin with quartz, a true marvel of modern engineering. Contrary to popular belief, quartz countertops aren't entirely natural. They're created by combining crushed quartz (around 95%), one of the hardest minerals on Earth, with resins and pigments (around 5%).
The resulting material is known for its exceptional durability, making it somewhat resistant to heat, scratches, and stains. Another advantage of quartz is its versatility in terms of colors and patterns. Whether you fancy a bold, vibrant hue or a subtle, earthy tone, there's a quartz countertop to suit every style.

Quartzite:

Next up, let's explore quartzite, a breathtaking natural stone that exudes elegance and charm. Unlike its engineered cousin, quartzite is 100% natural. It originates from sandstone and undergoes a metamorphic process deep within the Earth's crust, resulting in a stunning and durable material for your countertops.

Quartzite is revered for its mesmerizing patterns and unique veining. Each slab tells a geological tale, creating a one-of-a-kind masterpiece in your kitchen. However, it's worth noting that quartzite requires a bit more care than quartz. It can be susceptible to staining and scratching, so regular sealing and some mindfulness when using it are essential to keep it looking pristine.


Granite:

Last but certainly not least, we have granite, the timeless beauty that has adorned kitchens for centuries. Granite is an igneous rock formed from the slow cooling of molten magma deep within the Earth. This natural wonder is treasured for its striking variety of colors, patterns, and veining, giving each slab a unique and captivating character.

Granite countertops are renowned for their durability and resistance to heat, making them a reliable choice for culinary enthusiasts. However, like quartzite, granite requires periodic sealing to maintain its luster and protect against potential stains. With a little love and care, your granite countertops will retain their timeless allure for years to come.

In summary, here's a quick rundown of the key differences between quartz, quartzite, and granite:
  • Quartz: Engineered stone combining crushed quartz, resins, and pigments. Offers exceptional durability, resistance to scratches and stains, and somewhat resistant to heat. Boasts a wide range of colors and patterns to suit various styles.
  • Quartzite: Natural stone derived from sandstone through metamorphosis. Showcases mesmerizing patterns and unique veining. Requires regular sealing and gentle maintenance to preserve its beauty.
  • Granite: Natural igneous rock with a stunning variety of colors and veining. Renowned for its durability and heat resistance. Requires periodic sealing for protection against stains.
There you have it. Armed with this knowledge, you're now equipped to make an informed decision about which kitchen countertop material best suits your needs and style. So go forth, create culinary masterpieces, and let your countertops become the envy of all who enter your kitchen!


This article is for general information purposes only. Rick Kelley Builders makes no representations or warranties of any kind, express or implied, about the completeness, accuracy, reliability, suitability, or availability of any information contained herein.

Get Your Grill Ready!

4/21/2023

 
Picture
Spring is here, and for many of us, that means it's time to dust off the old outdoor gas grill and get it ready for the grilling season. But before you fire it up, it's important to take a few steps to ensure that your grill is clean, safe, and working properly. In this blog post, we'll share some tips and instructions on how to get your outdoor gas grill ready for spring, and how to repair it if there's an issue.

Clean the grill


The first step in getting your outdoor gas grill ready for spring is to give it a good cleaning. Over the winter months, your grill may have accumulated dirt, dust, and debris, so it's important to get rid of all of that before you start cooking. Here's how to do it:
  • Turn off the gas supply to the grill and disconnect the propane tank.
  • Remove the grates and any other removable parts from the grill.
  • Scrub the grates with a wire brush or grill brush to remove any built-up residue. If the grates are particularly dirty, you can soak them in hot, soapy water first.
  • Clean the inside of the grill with a wire brush or scraper to remove any leftover food or grease. Be sure to remove any debris from the burner tubes and ignition ports.
  • Wipe down the exterior of the grill with a damp cloth.
  • Check the gas supply

Before you fire up your grill, it's important to check the gas supply to make sure it's working properly. Here's how:
  • Reconnect the propane tank and turn on the gas supply.
  • Turn on the burners and check the flame. The flame should be blue and steady. If it's yellow or flickering, there may be an issue with the gas supply or burner tubes.
  • Check the hoses for any cracks or leaks. If you notice any issues, replace the hoses before using the grill.
  • Check the ignition

If your grill has an electronic ignition system, it's important to check it before you start cooking. Here's how:
  • Turn off the gas supply to the grill.
  • Remove the ignition cap and check the battery. If the battery is dead, replace it.
  • Replace the ignition cap and turn on the gas supply.
  • Test the ignition by turning on the burners. If the ignition doesn't work, there may be an issue with the spark module or electrode.
  • Repair any issues

If you notice any issues with your grill while you're getting it ready for spring, it's important to address them before you start cooking. Here are some common issues and how to fix them:
  • Uneven heat: If the heat distribution on your grill is uneven, it may be due to clogged burner tubes. Use a wire brush or scraper to clean out any debris from the tubes.
  • Low heat: If the flame is low or won't stay lit, there may be an issue with the regulator. Check to make sure the regulator is properly connected and the hoses aren't damaged.
  • Hot spots: If your grill has hot spots, it may be due to a faulty heat shield. Replace the heat shield if necessary.

By following these tips and instructions, you can get your outdoor gas grill ready for spring and enjoy a season of delicious outdoor cooking. If you encounter any issues that you're not comfortable fixing yourself, don't hesitate to contact a professional for assistance.


This article is for general information purposes only. Rick Kelley Builders makes no representations or warranties of any kind, express or implied, about the completeness, accuracy, reliability, suitability, or availability of any information contained herein.

GFCIs - What the heck are they?

3/31/2023

 
Picture
First, let’s talk about what GFCI stands for. Ground Fault Circuit Interrupter. They can be found in our kitchens, our bathrooms, on the exterior of our homes, sometimes in our bedrooms, and even in our basements. Go ahead and take a look around your home. I guarantee you’ll find several.
 
So, what are GFCI outlets, why are they needed, and how do they work?
 
GFCIs are designed to protect electrical wiring by causing the circuit to close or break whenever an imbalance occurs between outgoing and incoming circuitry. GFCIs are particularly important in areas of your home that are near water…bathrooms, kitchens, etc.
 
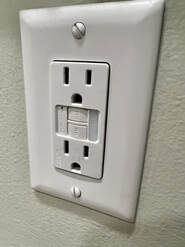
A GFCI looks like any standard outlet. However, it includes a “test” button and a “reset” button and unlike a standard outlet it continually measures the flow of electricity through it. I think most of us know about the effects of electrocution on the body that once a shock occurs the current can be so strong that we simple humans are unable to pry our hands away. So, the GFCI is here to help. They are incredibly sensitive to any change in electrical current and if it senses an issue the GFCI will immediately (like within 1/10th of a second) shut the power off without us having to do anything. For example, if you accidentally drop your plugged-in hair dryer in a sink full of water the GFCI would sense the power variance (as small as 4 to 5 milliamps) and immediately cut the power.
 
Being the amazing contractor that I am I bet you’re asking yourself what the difference is between a breaker inside your electrical panel and a GFCI.  A breaker and a GFCI are both helpful in preventing terrible things from happening, but they are vastly different. A breaker is generally associated with the protection of your home from electrical fires. Really important stuff obviously but little to do with the prevention of electrical shocks produced by outlets. That’s where GFCIs come in by directly detecting interruptions in electrical current and cutting power right then and there possibly saving your life.
 
How can you tell when a GFCI is going bad or is bad?
 
Just like most everything else in our world nothing lasts forever (my knees are a great example). GFCIs do wear out with age so it’s important to know how to test them. It’s pretty easy. All you have to do is grab some sort of electrical appliance and plug it into the GFCI and make sure the appliance is on and receiving power. Then while the appliance is on push the “test” button on the GFCI and the appliance should lose power and turn off. If that happens, you’re halfway there. Finally, push the “reset” button and your appliance of choice should regain power. That’s it. If the appliance lost power after pushing the “test” button and then regained power after pushing the “reset” button you’re good.

If your appliance didn’t lose power after pushing the “test” button or regain power after pushing the “reset” button then you need to immediately, without delay, either fix the issue yourself or call an expert. It could be that the GFCI is bad (just like my knees things we use all the time don’t last forever) or it could be that there’s a larger issue with how the GFCI is wired. Seriously, if you think you have an issue or one of your GFCIs fails the test procedure get it taken care of.
 
Finally, there are certain instances when a GFCI can trip repeatedly when there isn’t really an issue. This type of nuisance tripping tends to be caused by slight variations in the electrical current running through them. Here are some ways to avoid this issue…
 
  • Maintain all your power tools in good condition…no frayed wires, no sticky buttons, etc.
  • Use GFCIs only for circuits that are 100’ long or less
  • Do not connect stationary motors to a GFCI outlet
 
This is so important that I’ll say it one last time…if you suspect (even just a tiny bit) that you have an issue with one of your GFCIs replace it. They’re pretty inexpensive for something that can literally save your life.


This article is for general information purposes only. Rick Kelley Builders makes no representations or warranties of any kind, express or implied, about the completeness, accuracy, reliability, suitability, or availability of any information contained herein.

10 Home Maintenance Tips for Spring

3/26/2023

 
Picture
Spring seems to finally be here and with it brings about much-needed spring home maintenance including leaf-filled gutters, possible shingle issues, and HVAC maintenance. Following are 10 tips for spring:
 
  1. Take a good look at the exterior of your chimney for signs of deterioration. Make sure the chimney cap is still there and in good shape and check out the siding around the chimney and make sure it’s all there and in good shape. If you have brick or stone grab some binoculars and take a close look at the grout joints and make sure that the joints are intact and in good shape.

  2. Since you have binoculars out walk around your house and check out your shingles. Make sure they aren’t cracked, buckled, loose, or even missing (we’ve had some crazy high wind in Central Ohio lately).

  3. Since you’re already walking around your house look at all the trim (gables, soffits, around windows) and the windows themselves. Look for missing caulk (that could let in water and cause rot), soft spots on the trim and windows (indicates rot), and missing paint.

  4. While you’re walking around your house looking at the trim also keep an eye open for low areas in the yard and especially around your foundation. All low areas (especially around the foundation) should be filled with compacted topsoil to help prevent basement water issues and eliminate low areas (pooling water) where insects can breed.

  5. Check for loose or leaky gutters. Bad drainage can lead to water in your basement or crawl space. Make sure all downspouts drain away from the foundation and are clear of debris.

  6. Remove firewood stored near your house. It should be stored at least 18” off the ground and at least 2 feet from any structure.

  7. Have a qualified heating and cooling contractor clean and service the outside unit. Clean coils operate more efficiently, and an annual service will keep the system working at peak performance levels.

  8. Change the batteries in your smoke alarms and carbon monoxide alarms and test each one of them to make sure they are all functioning correctly (if one works it doesn’t necessarily mean all of them are working). According to the National Fire Protection Association an average of 1,450 fire deaths occur every year in homes with missing or non-functioning smoke alarms.

  9. Clean out your dryer vent. There are several companies that will do this for you or you can do it yourself with an electric (NEVER use gas-powered equipment inside your home) leaf blower. Just unhook your dryer from the duct, stick the business end of the ELECTRIC leaf blower into the duct, wrap a wet towel around the opening to keep lint from blocking back into the room, and turn on the blower. Again, DO NOT use a gas-powered leaf blower inside your home!
    ​

  10. Finally, before outside temperatures are regularly warm enough that we can enjoy having the windows open check your screens. In fact, I’m typing this in my home office and just looked out a window and noticed I have a torn screen. Most local hardware stores will replace screens (assuming the frame is in good condition) for a reasonable amount.
Picture

This article is for general information purposes only. Rick Kelley Builders makes no representations or warranties of any kind, express or implied, about the completeness, accuracy, reliability, suitability, or availability of any information contained herein.

Luxury Vinyl Flooring - Why is it so great?

8/4/2022

 
Picture
I’m not talking about the old-school vinyl flooring that was shiny and arrived at your house in a big heavy roll that had to be glued down to ¼” thick luan underlayment. No…I’m talking about vinyl plank flooring that looks incredibly realistic and is unbelievably popular due to its durability, versatility, and ease of use. Just like with other products not all brands of Luxury Vinyl Flooring are created equal so read on to find out what might make this a good flooring choice for you and why we recommend it to many of our clients.


What is Luxury Vinyl Flooring?

Within the realm of Luxury Vinyl Flooring there are basically two types - luxury vinyl tile (LVT) and luxury vinyl plank (LVP). Both types offer styles that mimic all sorts of surfaces such as wood, concrete, slate, marble, and tile complete with “grout” joints. The tiles or planks are constructed from multiple layers of plastic and padding which vary in thickness by manufacturer.

So, now I bet you’re wondering what each of those layers are, right? The outer layer or top layer is called the wear layer. This layer is vitally important and is what you walk on, so the thickness of this layer is unbelievably important. Basically, the thicker the wear layer the more durable and long-lasting your Luxury Vinyl Floor will be so pay attention to the data provided by the manufacturer. The thickness will be listed in mils and 1 mil is one-thousandth or an inch. 

The next layer down from the wear layer is called the core. The core gives the floor stability, so it won’t buckle or warp. Under the core you’ll find the underlayment layer which usually consists of cork or foam which helps reduce noise transfer and provides a cushion to make the floor a little more forgiving.

Now here’s a bit of a twist…some Luxury Vinyl Flooring are manufactured with rigid-core vinyl that have reinforced engineered wood or even a stone core. Products that contain these cores are widely considered to be more durable which makes them a good choice for families with kids and/or large pets. 

Where can I use this stuff, you ask?

LVF is a great choice for really any room in your house especially where there could be spills, kids, or pets as the flooring is usually waterproof and moisture friendly. It’s great for kitchens, mudrooms, bathrooms, laundry rooms, and especially basements. Honestly, it a great flooring choice for just about everywhere. 

OK, so now you’re wondering how you clean this stuff, right?

Really the easiest way to clean your new LVF is to sweep or vacuum it and mop with a mild soapy water. That’s pretty much it. Obviously, always follow the manufacturer’s cleaning guidelines but mild soapy water is about all it takes.

Again, not all brands of Luxury Vinyl Flooring are created equal so be sure to read through the manufacturer’s specifications and don’t hesitate to call our office as we would be happy to help you!


This article is for general information purposes only. Rick Kelley Builders makes no representations or warranties of any kind, express or implied, about the completeness, accuracy, reliability, suitability, or availability of any information contained herein.
<<Previous

    Author

    Jeremy Kelley is a home builder and remodeler in the Columbus, OH area.  He is an avid volunteer, family man, and knows the difference between your and you're.

    View my profile on LinkedIn

    Archives

    July 2023
    June 2023
    May 2023
    April 2023
    March 2023
    August 2022
    June 2022
    January 2020
    August 2019
    May 2019
    February 2019
    January 2018
    August 2017
    July 2017
    December 2016
    November 2016
    July 2016
    May 2016
    April 2016
    March 2016
    January 2016
    December 2015
    July 2015
    June 2015
    May 2015

    Categories

    All

    RSS Feed


614.437.2013  
7521 Concord Road 
Delaware, OH 43015
info@rickkelleybuilders.com
Picture
© Rick Kelley Builders
All Rights Reserved